

hand rolled croissant recipe with poolish
Creating the perfect croissant by hand is a delicate balance, and one of the most critical elements lies in controlling fermentation during the laminating process. It's essential to minimize or eliminate fermentation at this stage, as gasses in the dough or proofing can lead to the butter layer cracking, thereby compromising the sought-after layers. This recipe strategically uses Poolish to imbue the dough with that characteristic fermentation flavor, all while bypassing the need for proofing the final dough. This approach not only simplifies lamination but also extends the window of workability.
A unique aspect of our method is performing the laminations consecutively. This approach avoids the butter hardening during resting periods between turns, which is common in most recipes, and it also inhibits fermentation during lamination. This modification not only expedites the entire process but also enhances the ease of lamination.
To facilitate back-to-back folds, we've tailored the dough to be more extensible, significantly easier to roll out compared to the firmer doughs used in professional settings. This requires a gentle touch during rolling to avoid cracking the butter, given the dough's enhanced pliability. The dough must then rest overnight in the fridge to relax sufficiently for the laminating process.
For a detailed demonstration on the process for this recipe, sign up for our 2 hour masterclass on July 10 2024 where we will demonstrate the recipe, give tips and answer questions from viewers.

Recipe
Poolish:
Flour: 270 g
Water: 270 g
Instant Yeast: Approximately 0.13 g (a pinch)
Final Dough:
All Purpose Flour: 565 g
Pastry Flour 150
Cold Milk: 150 g
Ice: 50 g
Warm Water to dissolve yeast(26C): 50 g
Fine Sea Salt: 24 g
Large Eggs (lightly beaten): 1
Sugar: 70 g
Instant Yeast: 8 g
Unsalted Butter(cold/cubed): 85 g
Diastatic Barley Malt: 3.8 g (optional)
Butter For Lamination 454g
Instructions for dough preparation:
Prepare the poolish 10-12 hours before mixing the dough by mixing all ingredients together in a loosely covered container large enough to allow the mixture to triple in size.
Mixing The Dough
In the bowl of a stand mixer add the warm water and yeast. Stir to dissolve.
Add the remaining ingredients, including the ripe poolish, and mix to a shaggy mass with the dough hook in your hand. Attach the bowl and dough hook to the mixer and mix on low speed for 4 minutes, followed by medium speed for 4 minutes to medium gluten development. Place the dough in a plastic bag or loosely sealed container and refrigerate overnight before laminating.
The lamination process
Step one is to create your butter block. This process will depend on the butter you are starting out with. If you have a sheet of high quality professional laminating butter then you are ready to go. If not read this article on selecting butter for your lamination before starting. (Being in Canada, high quality lamination butter is very hard to come by as our dairy industry is very tightly regulated and most imports are not allowed). For butter that isn’t already in a sheet, or butter that is in a sheet but not super pliable to begin with here is what we are going to do. In between a folded silpat (or parchment but it tears moire easily) pile up your cold butter and pound it flat with a rolling pin. This helps to make the butter more pliable without over warming it. Then we are going to roll it out into a sheet. Pay very close attention to maintaining an even thickness throughout the process. Most people tent to push harder with one hand and end up with one side thicker than the other if they aren’t careful. To square up the edges, place the pin on the silpat off to the the side of the butter block, push down hard and roll into the butter, pushing the rounded or uneven end of the butter straight. Then carefully even out the extra thickness you have created by rolling it out to the corners to to a thin spot in the butter. Do this for each side of the butter (the edge on the fold will naturally follow the straight line of the fold). Aim for dimensions of 8”x12”.


Now that we have the block roughly square we are going to smooth it out with a bench scraper and square it up. This neatens up the block but also adds to the flexibility of the butter.
IMPORTANT! Whatever butter you are working with it must be able to flex without cracking at this point. If it cracks when you flex the butter, it will crack when you laminate it. You must either work the butter further or let it warm up slightly. Every butter has an ideal working temperature (this varies depending on the butter) but don’t rely on simply warming the butter to get it flexible. When warm butter hits the cold dough it is likely to seize and crack, and is more likely to squeeze out during lamination. Cold and pliable is ideal.

Squareing Up The Dough
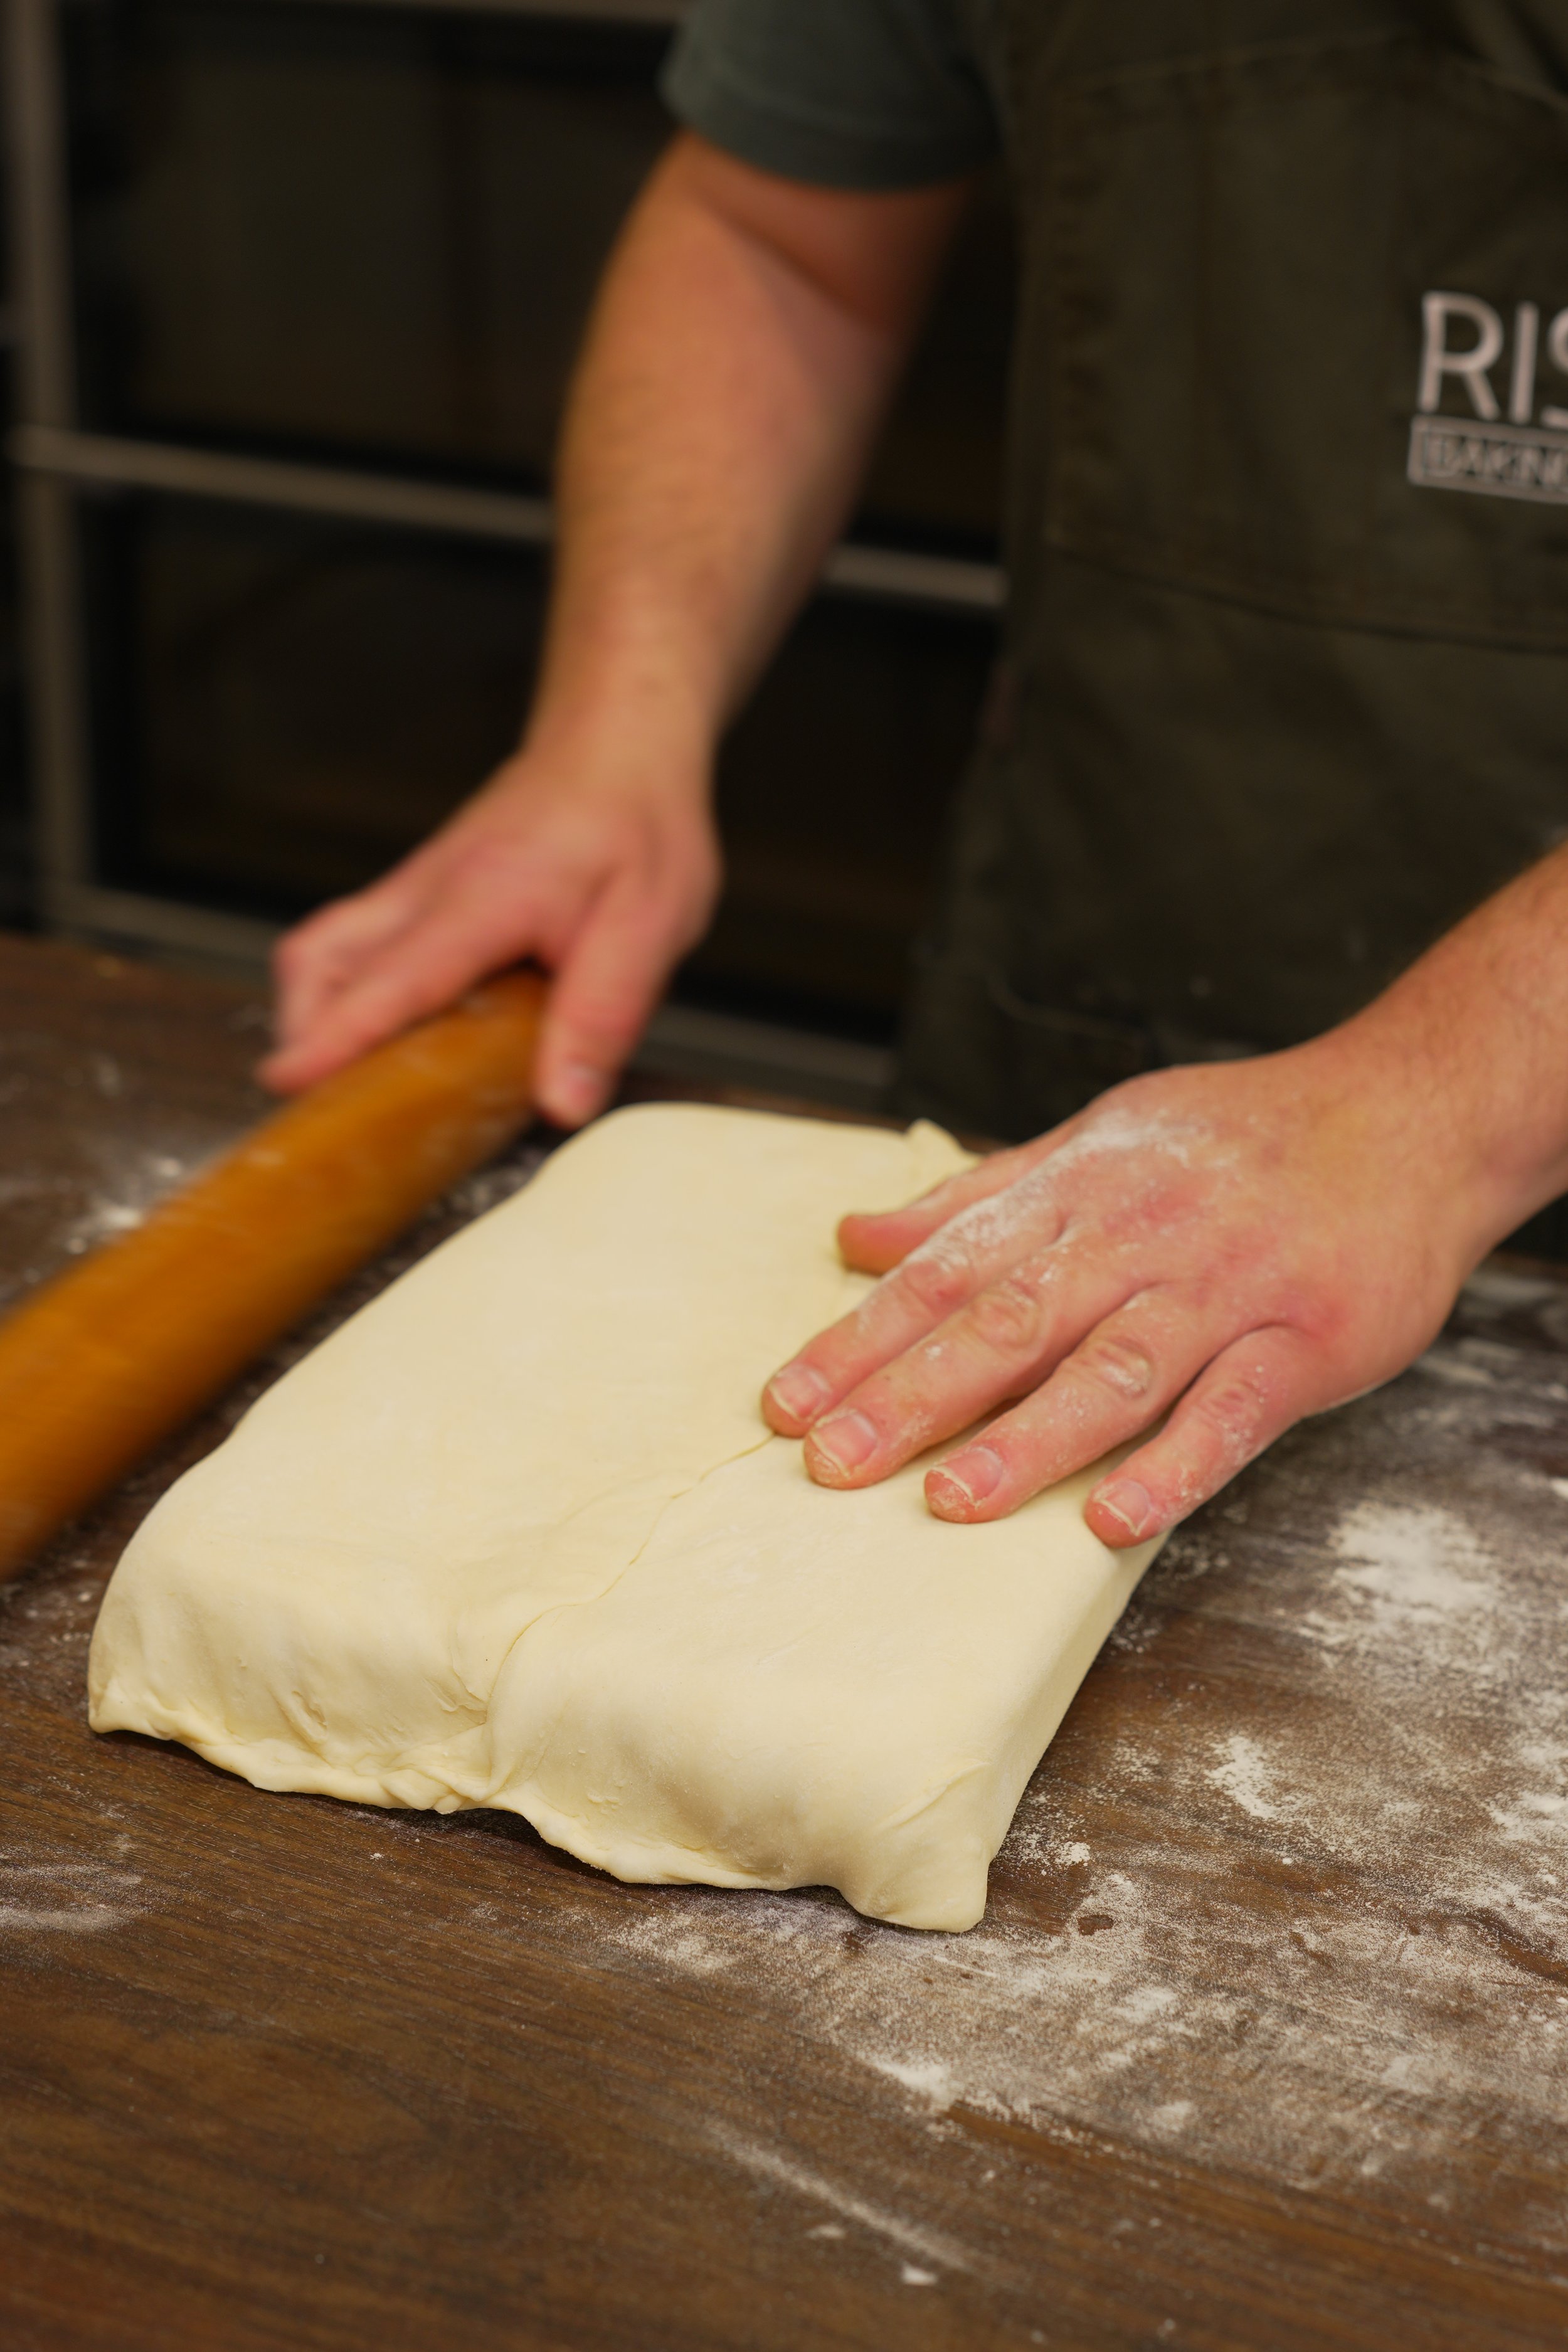
Using your rolling pin roll the dough out to a rectangle with dimensions that are twice the width of the butter block (8x2=16”) and the same height as the butter block (12”). The dimensions can vary slightly with the size of the block and dough as long as the dough is twice as wide and the same height as the butter. Make sure the dough has as square corners as possible and is an EVEN THICKNESS!
I really want to emphasize that keeping things as squared up as possible throughout this process is essential! Not only will it minimize the amount of trimming you will need to do but it will also result in a far superior lamination. Keep it squared up!!


Lock In the Butter
When I do this with a sheeter it is slightly different in that I don’t entirely encase the butter in the dough. When laminating by hand I find it easier to seal the dough all the way around the butter to keep things neat and square
Place the butter block right in the middle of your prepared dough. Smooth out the butter one last time with the bench scraper. Fold the sides over the butter to meet in the middle and lightly press them together. It is important to maintain an even thickness so we don’t overlap the dough here - just coax it together. Then i seal the dough in a very thin layer at the open ends.


Roll it out and perform the first fold
Begin by squaring up the block with your rolling pin. Starting with lighter pressure so as not to separate the butter layer begin to lengthen the dough towards the ‘open’ ends of the dough. Increase pressure as the dough lengthens and thins. Lengthen the dough to approximately 26-30” (do not widen the dough).
Remember - keep it even and keep it squared up!
Flip and rotate the dough from time to time to keep things even. Start with gentle pressure and switch to very firm pressure as the dough thins out. Excessive rolling will work the butter into the dough and result in a tighter bready crumb with less defined layers.


The fist fold (turn)
The process of lamination involves folding the dough over itself several times to create many layers of dough/butter/dough etc. There are several different ways to fold the dough but the fold we will be using in this recipe is the Double Fold, also known as a ‘Book Fold’. My preferred term for this fold however, is the 4 fold since we are folding the dough into 4. We will perform two of these 4 folds back to back and then let the dough relax before rolling out and shaping the croissants.
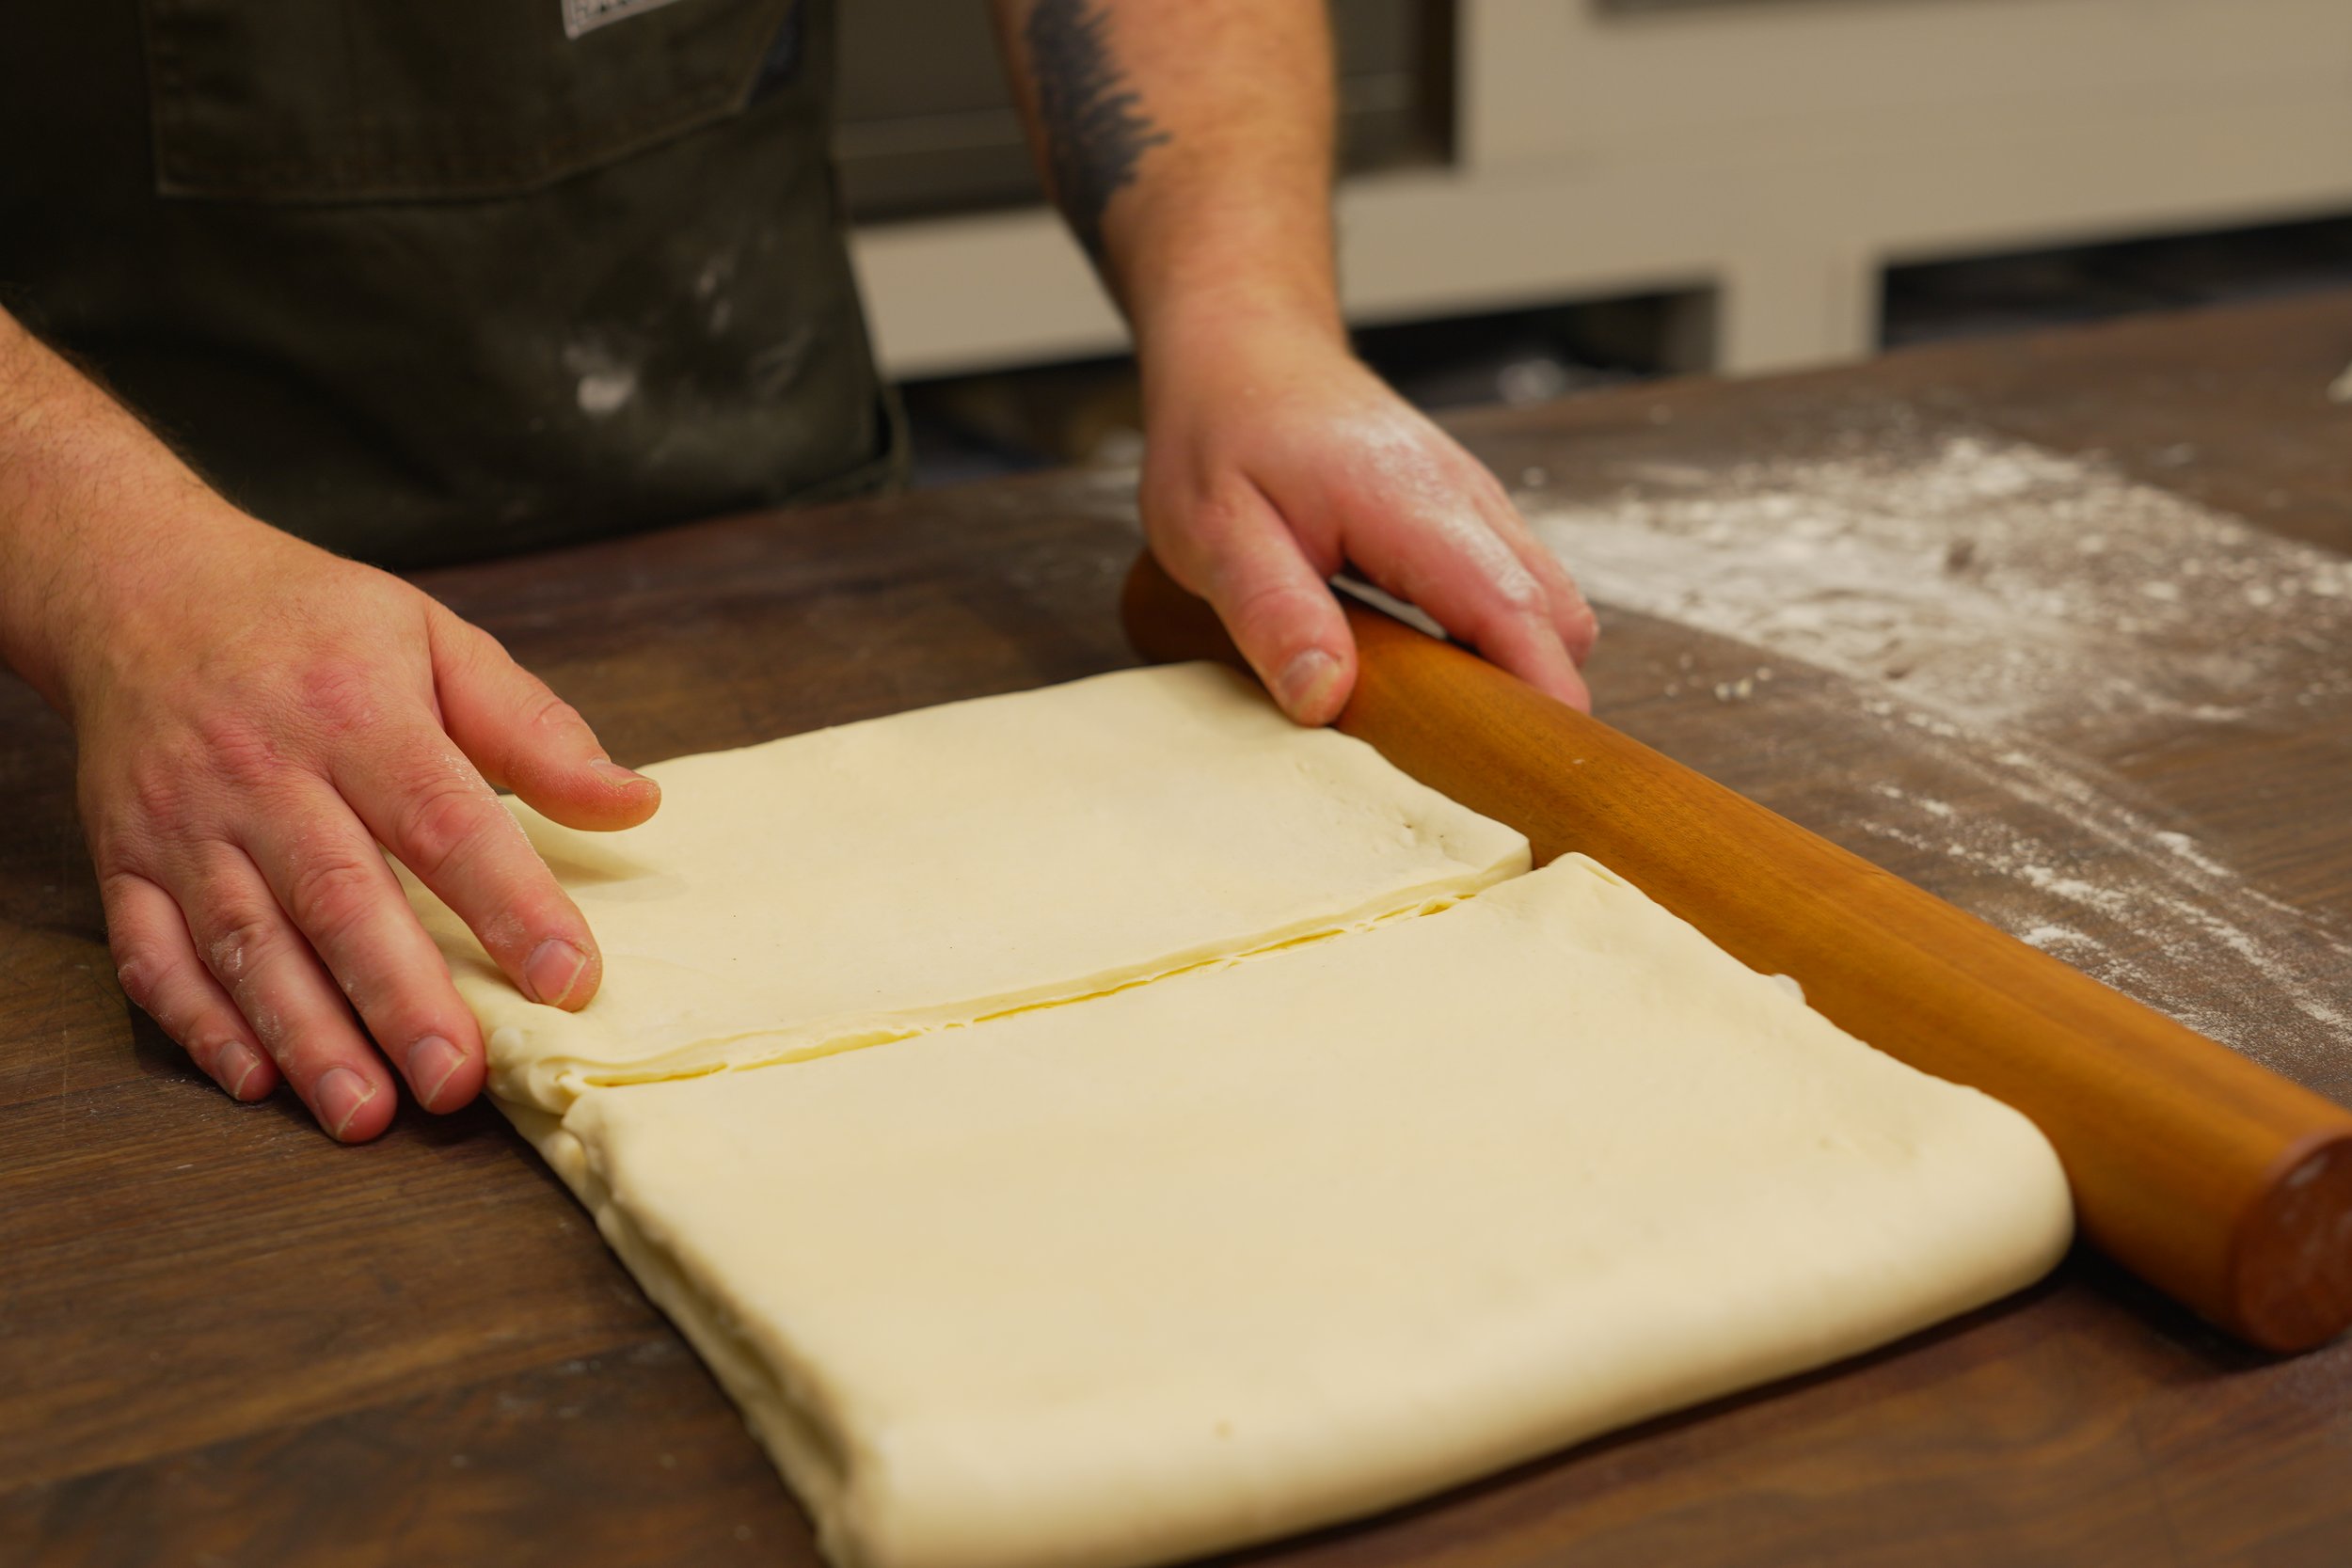
The first step is to trim the dough back until we see an even layer of butter from edge to edge of the dough. If you skip the trimming stage you will have several breaks in the layers of your lamination and areas with much fewer layers. The trimmings can be used in several different products such as rerolling out into a sheet and rolling up into a cinnamon bun type pastry, or simply rolling the trimmings up in cinnamon sugar and layering in a pan to bake up as a delicious layery loaf.
Before folding the dough make sure you are as squared up as possible and an even width all the way along the dough. Brush off any excess flour with a pastry brush to ensure the layers of dough will meld together once folded. Fold one end of the dough towards the centre and then the other end in towards the centre, leaving a 1/2” gap between the edges in the middle. Us a ruler to make sure that each side has the exact same length and then fold the whole thing in half along the centre gap. Make sure all of the edges line up perfectly and square of the edges with the side of your rolling pin.


The Second Fold
Many recipes will have you returning the dough to the fridge at this point to relax enough to perform the second fold. In this method we have formulated the dough to be relaxed enough to do the folds back to back which not only makes the process quicker and easier but also results in a better lamination.
The method for the second 4 fold is exactly the same as the first, but requires a bit more finess the keep the layers even and the dough square. The dough is always rolled out towards the ‘open ends’ of the dough, ensuring that each turn stretches the dough in a different direction. Again we will start with light pressure and increase the pressure as the dough thins. Pay special attention the the ends of the dough to ensure the layers stay aligned. Begin by pressing the rolling pin down on one of the open ends and gently but firmly rolling in towards the center. This will help press the layers at the edge together to prevent them from squeezing out to different lengths while rolling and reduce the amount of trimming required. Do this at both ends a few times during the rolling out. Roll the dough out again to around 26-30” and again we will trim the open edges. This time we will trim back enough to reveal 4 complete layers of butter. Square up the block, wrap tightly in plastic and refrigerate for 90 minutes (if the dough has warmed significantly place it in the freezer for the first 30-45 minutes). Your dough has now been laminated and you are ready to move on to the final roll out and shaping.


The Final Roll Out And Shaping
For the final roll out we are going to widen the block (along the closed end) to 11-12”, and then roll out the dough along the open edges to a thickness of 5cm. Try to use a lot of pressure as the dough thins to minimize the amount of rolling required. The more you work the dough through rolling, the more the butter will be absorbed into the dough which will ruin the texture and layers of your croissant. Once you have the dough 11-12” high and widened until it is a thickness of 5mm you will trim 5mm from each of the ling sides of dough to reveal the layers inside. Measure 2.5” increments along the bottom of the dough and on the top measure 2.5” increments that are offset to be in the middle of the bottom measurements. Cutting from one bottom marking to the next top marking should now give you a long triangle. Cut the rest of the dough into triangles which should roughly measure 2.5” x 10.5-11”. Shape the croissant as demonstrated in the video below. First elongate the triangle very gently between your thumb and fingers taking care not to rip and layers. Move quickly to avoid melting the dough, especially if you have hot hands. Smoosh the very tip of the triangle onto the table - this helps with shaping and also creates a more stable base to prevent the croissant from tipping over during proofing. Gently stretch the base to widen by about 1/2” and roll the croissant ending with the smooshed tip underneath the croissant.


Proofing and Baking
The shaped croissants can be immediately frozen for up to two weeks for baking at a later date (add 6 hours to the proofing - proof overnight) or proofed for baking right away.
The croissants need to be proofed in a warm and humid environment if possible. There are a few ways to achieve this. One is to place them in a cool oven along with a bowl of hot/almost boiling water. Another method is to get a large plastic bag and place your entire sheet pan inside with an optional cup of hot/almost boiling water. Slightly inflate the bag and seal it to create a bubble that keeps the bag off of the tops of the croissants. The temperature should stay below 26-28C (the range depends on the melting point of the butter you are using). Under warmer conditions the proofing will take 4-6 hours and at room temperature the will take 6-8 hours with the time range reflecting the range of temperatures - warmer temps will be faster and cooler temps slower. The croissants are ready to egg wash and bake when the have a good wobble to them when the pan is gently shaken back and forth. They will be 2.5-3 times their original size. Preheat your oven to 450F. Use convection if you have it but lower the temperatures by 25F (be aware that some ovens automatically make this correction for you when selecting convection!). Before loading egg wash the croissants taking care to avoid washing the exposed layers. The egg wash consists of one egg, two yolks and 1T of heavy cream beaten very well. Take care to avoid pooling of egg wash at the bottom of the croissants as it creates an unpleasant bit of scrambled egg on the bottom of the baked croissant. Immediately before loading the oven reduce the temperature to 400F and load the croissants into the oven. Bake for 12-15 minutes reducing the temperature to 325F after 5 minutes. Do not open the oven to peek until the croissants are well coloured and stable. Baked to a deep brown so they remain crispy after cooling. Enjoy and remark at how amazing you are for creating such a beautiful thing!